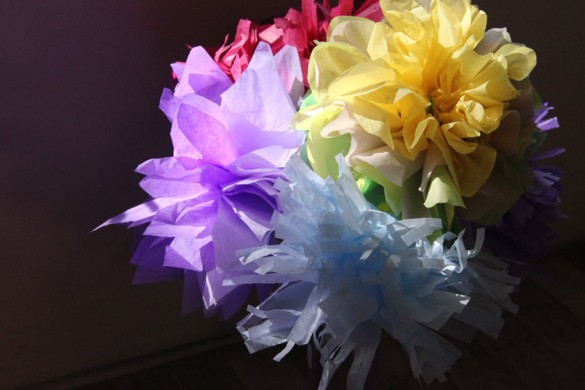
Here are a couple of DIY project to make for mom this year. By using 3M ScotchBlue Painter’s Tape you can make mom personalized and inexpensive projects that will be sure to make her smile.
Shabby Chic Clay Pot
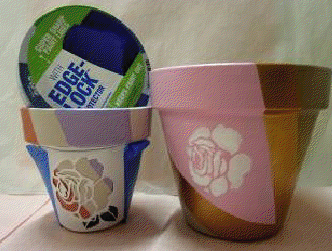
Perfect for the garden-loving mom, this clay-pot project can incorporate her favorite colors and flowers so she has a one-of-a-kind gift made with love.
1 – clean, dry clay pot (any size)
1 – roll of ¾” 3M Scotch Blue Painter’s Tape #2090 Original Multi-Surface
3 – jars of paint (any colors)
1 – jar of glaze (any color)
Paint brushes for each color
1 – roll of paper towels
1 – flower stencils
1. Wipe your clay pot with a damp sponge or paper towel. This will prep the pot by making sure all debris and dirt are removed. Let the pot dry fully.
2. Choose a color palette that fits your taste and décor. We recommend using three colors. A three color palette is chic, and provides enough freedom so that you are able to mix and match colors a variety of colors.
3. Choose which color you want to use for the shapes and stripes, and which color you want to use for the base: a neutral color provides a delicate finished product, while a bright color will make the stripes pop. In this example, we chose to use the bronze as the base of our pot, knowing that most of it would get covered up by the tan and light pink paint. The metallic color will provide for a chic vintage vibe.
4. On the dry pot, use a sponge or a paintbrush to cover the entire pot with the base color. Using a sponge will give the pot a rustic base, while a paintbrush will provide a smoother look and feel. Let this paint dry overnight. It may only take a few hours for the pot to dry depending on the paint you use, but it’s better to play it safe.
5. After the pot is completely dry, use ScotchBlue Painter’s Tape to mark off diagonal lines in any design and pattern you desire. Make sure the tape is pressed firmly so it contours to the pot. This will ensure clean, sharp lines when the tape is removed.
6. Decide what area you want to designate to the remaining two colors. Once you have decided where each color should go, you are ready to paint.
7. Use a paintbrush and apply an even layer of paint in each color designated area you have created. If you would like more coverage, wait until the paint has dried a bit, then apply another coat of paint. Continue to paint your pot until each shape is filled in.
9. The following day, slowly remove the ScotchBlue Painter’s Tape at an angle. This will ensure clean, sharp paint lines.
10. Either purchase or create a flower stencil.
11. Use ScotchBlue Painter’s Tape to tape the stencil to the outside of the painted pot.
12. Use a brush or sponge to fill in the stencil. Slowly remove the stencil and allow the paint to dry.
13. Finish your painted pot with a clear glaze. This will protect the paint from chipping or dulling in the future.
Revamp Picture Frame
Framed photos is always a crowd pleaser when it come to gifts for mom, but giving her that photo in a frame you’ve personalized just for her will add something special to this gift favorite.
– ruler
– ScotchBlue Painter’s Tape
– Various Paint colors
– Paintbrush
– photo frame (or matte border of photo frame)
1. Purchase a picture frame with a wide enough frame so you are able to decorate it easily, and be creative. If you prefer, readers can also decorate the matte border of a picture frame.
2. For this example, measure the vertical sides of the picture frame. Note the number of inches and divide the number of inches by 6.
3. Using a pencil, lightly mark the side of the frame with inch wide units. This will ensure you will have evenly spaced decorative squares at the end of the project.
4. Along the top of the frame, measure in from the outer corners an inch. If you have a wider frame, you can measure in an inch and a half, two inches or any amount you desire.
5. Repeat step 4 along the bottom of the frame.
6. Using ScotchBlue Painter’s Tape, lay a piece of tape vertically, connecting the mark at the top of the frame, to the mark at the bottom of the frame.
7. Repeat step 6 on the opposite side of the frame.
8. Using ScotchBlue Painter’s Tape, lay a piece of tape horizontally underneath the first pencil mark and connect it directly across to the other side of the frame. ScotchBlue Painter’s Tape is an inch wide so each of your squares will be spaced out an inch.
9. Choose the paint color you would like to use, and paint inside of each square you have created.
10. Let the paint dry for a few hours and apply a second coat of paint if need be.
11. Allow the paint to dry overnight
12. Slowly remove the ScotchBlue Painter’s Tape at an angle to ensure clean, crisp paint lines. Now your frame is decorated and ready to hold your favorite photographs!
* We did not receive monetary compensation or product for this post. We’re sharing these tips to our DIY readers. The review is in our own words and is our opinion. Your results and opinions may differ.


