I love doing art projects with my kids, but the expense and clean up can be overwhelming. This
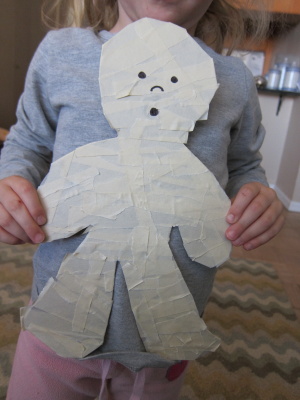
Halloween, I came up with a make-your-own mummy project that is a hit with my three year old – and even better it’s cheap and easy. The materials are in every home – an empty cereal box (or any similar weight cardboard), a roll of masking tape and a scissor.
Step one: Cut a human figure out of the cereal box. My first attempt sort of resembled a gingerbread man. Don’t waste time with lots of details like fingers and toes.
Step two: Tear or cut strips of masking tape. The torn masking tape gave best mummy-like results. Older kids can probably even tear the tape themselves.
Step three: Let your little one dress the mummy by placing the tape all over the cardboard figure. There are no rules. Just encourage them to cover the entire figure so that he doesn’t get “cold.”
Step four: Clean the edge of the figure by either cutting the pieces of tape that fall outside of the
mummy shape or folding them over.
Step five: The last step is purely cosmetic and optional. My daughter really wanted to add an eyes, nose and mouth, as well as buttons for our spooky mummy. Permanent marker works best on the masking tape but you could also cut out pieces and attach with a glue stick.
Our plan is to have a mummy to represent every member of our family on our front door by Halloween.
Boo to you and yours!
– That’s IT Mommy, Jill





6 comments
I love it! Great idea. I can’t wait to try it with Adeline =)
I also love this!! I’m going to try this with my daughter on Sunday!
What a fun idea – love that it uses everyday materials!
Oh this is great, I’m doing this with my daughter this weekend! I have a cereal box sitting empty on the counter waiting to cut the box top off of! Perfect:)
This mummy looks toasty warm. Your 3 yr old covered every spot 🙂 Thanks Jill, for an easy & very cute project to do with my granddaughter.
Oh, that is too cute! love the tutorial. Thanks for sharing 🙂